Tuesday 8 July 2014

Sashed Charm Squares Quilt, aka 'A Quilt for Erin'

I really enjoy group sewing projects, you get to have all sorts of excuses to meet up on a school night and have a cheeky glass of wine, and get to obsess with pals over colours and plans for your quilt. I've done a few projects with Rachel, like our When the Rains Come quilt. (I should retro-blog about some other things we've sewed together.) This time I was working with Kim.

Our friend Erin was turning 40, and Kim and I wanted to come up with something creative and personal. So we thought of Erin at every step of the quilt we planned to make for her.

After a few false starts (looking back through emails with Kim - my how the plans changed!) we settled on a simple but effective pattern. Squares with sashing, with white sashing for every other square. I've made a quilt like this before- it lives in my lounge room (usually under the cat).
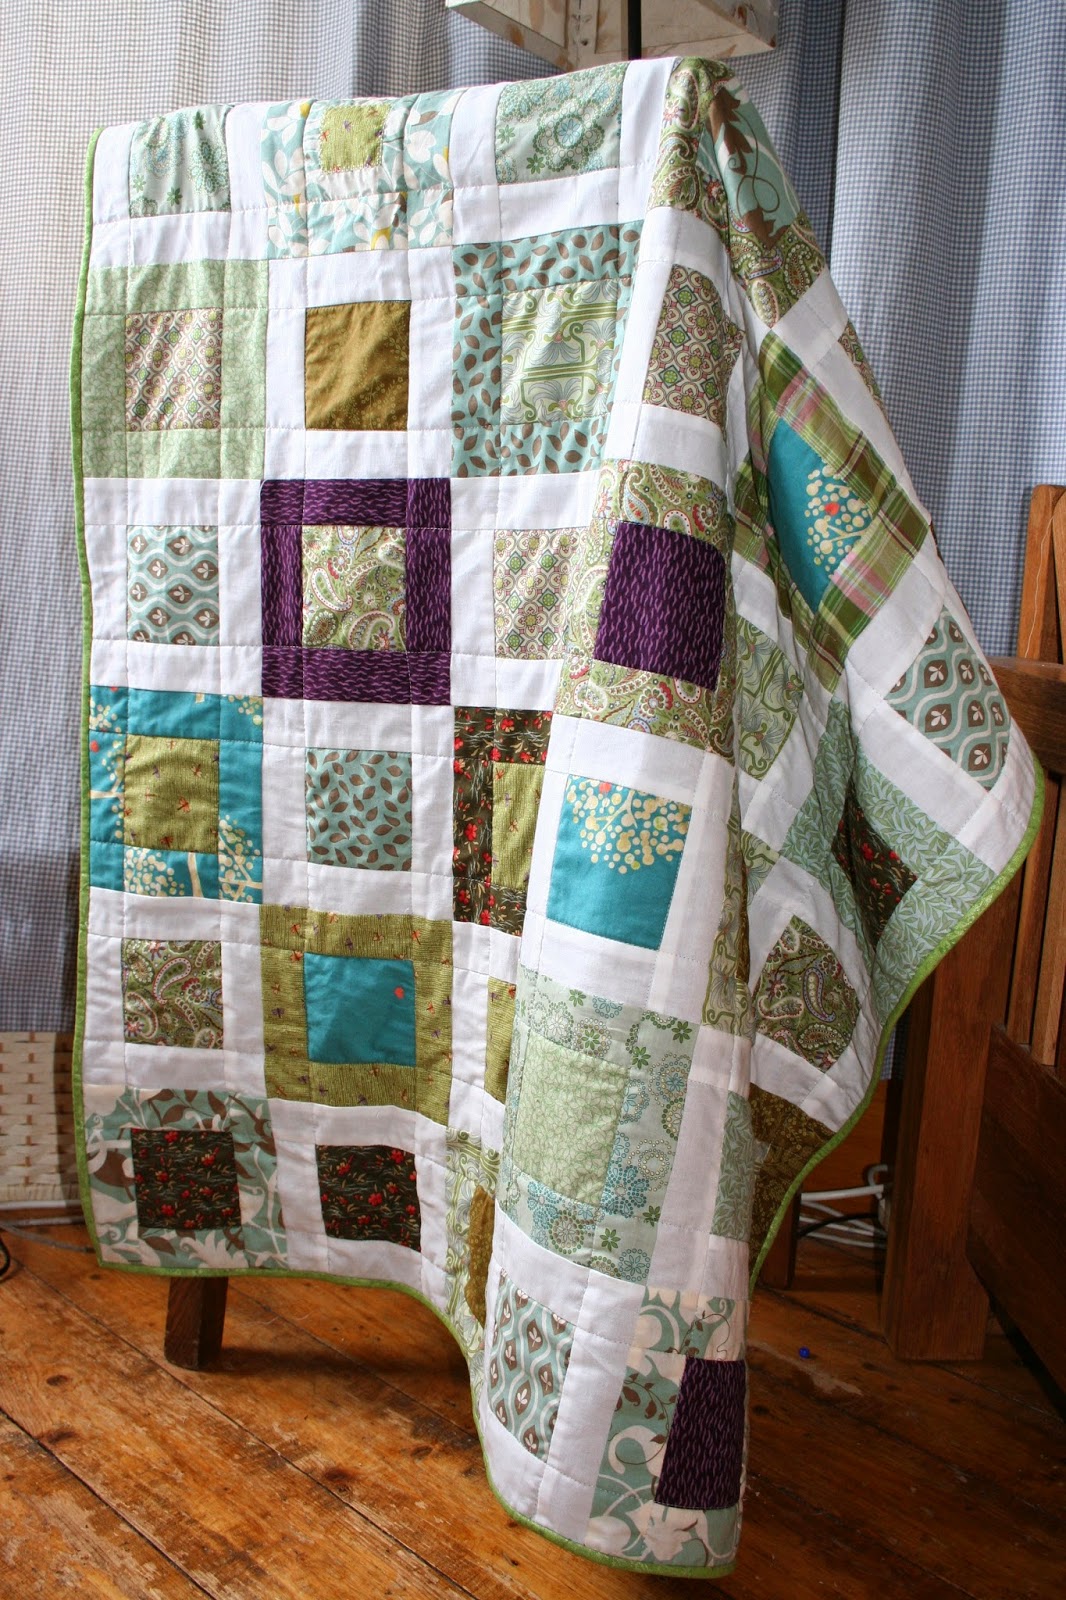
 A previous creation in greens and blues

I fell a bit in love with Moda's Chantilly design when I was searching for the fabric to use. It's bright, summery, a bit antiquey, a bit girly but not in a sickly sweet way. We bought 2 charm packs to make Erin's quilt. The pre-cut squares are 5 inches square. We went to Mandors to get co-ordinating fabric for the sashing. We congratulated ourselves with coffee and cake for doing such a good job of figuring out how much fabric we needed for all the sashing, and the complimentary colours we chose.
 
Chantilly charm packs and coordinating fabric - a lovely, fresh palette
The plan was to sew one charm pack each- I'd sew 40 patches and Kim would sew 40. Settling on 2.5 inch sashing- it was all too easy. Cut, chain sew (lazy slacker I am), press, get together for wine and laying out the quilt top. This was going to be easy peasy.

Chain sewing sashing to squares to save time
 Right... so... turns out everyone measures and rotary-cuts fabric ever so slightly differently. And then everyone has a slightly different take on how to sew a 1/4 inch seam allowance. When you multiply that factor by 80 patches, it's quite a noticable difference! Oops. Still, it's all part of the fun, wine was consumed, a solution found (i.e. I sewed some rows together and then ran away to leave Kim to do the rest) and a gorgeous quilt was made.

Kim quilted it together, and I finished it up with the binding and label.

We gave it to Erin at our camping weekend. We hope she gets as much joy out of it that we had making it.

ta daaa! Kim and me and Erin's quilt, I am the fool on the right.

Sunday 27 April 2014

Ampersand cushion with piping


My pal eversojuliet has an ampersand fetish and has been hinting at me for an ampersand cushion for her new flat. I was told it had to be black and white..  

My interpretation of a black & white ampersand cushion
 
To make it I found an attractive ampersand and printed it off. Then found some funky fabric (not exactly white) in my stash that would look good against black cotton. My button supply had become low, so I got a colourful bag of buttons from John Lewis for £3, along with a fluffy cushion.
After driving myself nuts for 15 minutes looking for the bondaweb I knew I had put somewhere safe, I created an applique ampersand on the cushion front. I used the button stitch instead of zigzag - I think it works much better for applique (thanks for the top tip Rachel)

Piping seemed to feature quite heavily in this year's Great British Sewing Bee. I felt I needed to give it a go, how hard can it be? Will this add that je ne sais quoi to my cushions? There's heaps of online how-tos, like this one, but I'm a bit lazy and have an aversion to using pins. So I cut out one inch strips on the bias, found a bit of acrylic wool (didn't have time to buy fancy piping and was inspired by Did You Make That?'s use of string), and used the zipper foot to make something that resembled what I thought it should look like. After a bit of swearing and wishing I made them 1.5inch strips, it seemed to work!

I attached the piping to the cushion cover front, and then put the cushion together in the usual way.
oooo- lovely bit of piping - and by using a bit of wool!


Not a bad housewarming pressie. I hope she likes it!


Sunday 30 March 2014

Hillarys Blinds Country Crafts Competition (part 2) How to make a simple cushion with button opening

What to do with all this left over fabric from my Scotty dog doorstop?  This can mean only one thing: 

It's cushion time.


I'll grant it's not the most exciting project in the history of craft- but this Calluna fabric I got for taking part in the Hillarys Blinds Country Crafts Competition will look great on my sofa.

We redecorated the living room in soft green about a year ago. I lucked out and got great green stripey curtains from the charity shop downstairs. I had to take them up, and kept all the scraps. Slowly I've been turning the scraps into cushions.

This simple cushion is a good project for a beginner. This is how I do it.

Step 1: Cut out fabric. 
Top: Cut out the exact dimensions, in this case 19 x 19 inches.
Back: I'm going to use stripey fabric for the back, so need two stripey pieces that will be big enough (at least 15 x 19 inches each). I like to leave the backing bigger than it needs to be, it makes me stress less.
Step 2: Sew the back cushion openings
Along the long edge (this will be the opening on the back) turn up the fabric 2 inches, turn again 2 inches, pin and sew along both edges of this 2 inch folded piece with a straight stitch. Do this again for the other backing piece. Iron them out.
Step 3: Button holes
Select some buttons- mine are from charity shops and never match. Place your button holes so they will divide the back opening into thirds. Most important is they are the same distance from the centre of the cushion. The easy way to do this is to fold your fabric to can get an idea where the middle of the fabric is. Mark where the buttons should go in that new 2 inch strip on one of your back panels.

Sew in your button holes. 
Top tip- try not to stress about machine button holes- it's one of those things that are always easier than you think they are going to be. Find a Youtube tutorial of someone else doing it (with your make/model of sewing machine) and try it on a piece of scrap before stuffing up your cushion.


Step 4: Sandwich right sides together.
Lay your back pieces face up, so the 2 inch seams overlap, and button holes are on top. Pin to stop them moving about too much. Lay your cushion top face down. Use plenty of pins all around the edges. You can see here how much extra fabric I have of the stripey backing.
Step 5: Sew
Sew with a straight stitch and 1/4 inch seam allowance all around the sides. When you go past a corner, reverse for a couple of inches, to give the corners more support.

Cut away excess fabric. This particular kind of fabric frays a bit- to keep it machine-wash friendly, run a zig zag stitch around the edges to anchor all of the loose ends.

Clip the corners.
Remove the pins, turn it out, and sew in your buttons. Add your cushion.

Fluff and plump and admire your work!


If you want to skip the buttons altogether, you could make the back panels overlap a few more inches, to create a pillow slip style cushion.
As The Dude would put it- this cushion really ties the room together, man.

Sunday 9 March 2014

Hillarys Blinds Country Crafts Competition : Scotty dog doorstop

A year or so ago, I found this lovely Scotty dog making tutorial by Jenny Allsorts. I did my best to sketch out the design, and have had lots of fun making them for friends.
My first Scotty Dog- made from Isle of Skye tartan
A couple of weeks ago I heard about Hillarys Blinds Country Crafts Competition. There were four fab fabric designs to choose from, and I really liked the heather colours and abstract design of the Calluna fabric. I was sent this great sample to create my entry. 

There's lots of heather in Scotland, so I thought I'd adapt the Scotty Dog pattern to make a doorstop.

I sketched out a new pattern piece so the scotty wouldn't have any legs.
Being a doorstop, it would need a sandbag to weigh it down. I used some scrap fabric to make a long pyramid shape, that was the same length as the Scotty front to back. I found a pack of Bulgar wheat in the back of the kitchen cupboard, that my kids refuse to eat. Perfect filler for the sandbag! Nothing goes to waste here.


If you have a go at this, make sure you leave a big gap on the top to get your sandbag in (I left from the tip of the tail to its neck). Once the bulgar wheat bag was in, I used stuffing to fill up the rest of the Scotty.


Check out my leather thimble I got for Christmas! You'll also notice a chopstick on the table- essential ear and tail poking out equipment.
Some buttons for eyes, and a simple ribbon collar (as the fabric design is quite busy), and ta daa! Scotty Dog Doorstop complete!

He's even spottier on the other side.

Thanks Hillarys for the fabric (and for getting me to explore the dark recess of my kitchen cupboard).


Woof


Thursday 6 February 2014

Jungle Path quilt- finito!


Yay! Finally I've finished this Jungle Path quilt, that I made using a layer cake, for my wee boy. It's lovely and colourful, and I wish we had proper sunlight in Scotland so I could show you how cool it looks. Or maybe I need photography lessons. Or PhotoShop lessons.

Artfully folded on a chair

And it only took 5 months to finish. Well, that's the beauty of working full time and trying to be a parent and trying to enjoy the kids and have a bit of a hobby. There's naff all time to get things done. To be fair, I've been playing around with crochet a lot too- so many people I know needed a new beanie over Christmas! Even if they didn't want one. Especially those people.

My daughter is now requesting a fairy quilt. I've got a few other projects up my sleeve too. A few weeks ago I made a new quilt top for myself. It's been ages since I've made one for my own room! Exciting times. The fairy quilt may have to wait a little while.

Anymahoo- this quilt was pretty easy to make, and looks so effective. I can recommend it! And to get two quilt tops out of one layer cake- bargain I tells you!

I kept the quilting really simple- basically stitched in the ditch, along the outside of the white sashing of the centre square patches in the blocks. This was so much quicker than free motion embroidery. Although FME would have probably looked better. Oh well, nae bother!

My favourite photo of it is this one, on the lower bunk (with a crocheted dinosaur I made Master C for Christmas).


What 3 year old boy wouldn't love it?